.avif)
When you’re managing your cloud infrastructure, especially across multiple services and environments, securing access to your resources is an important aspect. This is important because the security of your infrastructure relies on controlling who has access to your resources and making sure that access is properly authenticated.
Normally, AWS uses access keys for authentication, but managing and rotating these keys is tedious and prone to error. If these keys are compromised or not properly rotated, they can become a serious security risk for your infra.
OIDC (OpenID Connect) provides a more secure and efficient method for handling your authentication by using federated identities, eliminating the need to manage static AWS access keys. Instead of storing and rotating access keys, OIDC uses your existing identity provider (in this case, Azure AD) to authenticate users and services, allowing simple access control without any management of keys from your team’s end.
With OIDC, Azure DevOps pipelines authenticate using the identity provider, rather than directly managing AWS access keys. This is done via a service connection, which securely connects Azure DevOps to AWS using OIDC. This approach has several key benefits:
- Security: With OIDC, authentication is tied to an identity provider, which means you can leverage existing security mechanisms like MFA (multi-factor authentication) and ensure that your credentials are never stored or hard-coded in your pipeline scripts.
- Less Management Overhead: Instead of managing and rotating access keys, OIDC uses tokens that are short-lived and automatically handled by your identity provider. This reduces the complexity and administrative burden of key management.
- Centralized Control: Since OIDC is integrated with your identity provider, access control can be centrally managed. This means you have better visibility into who has access to your AWS resources, and you can implement policies more effectively.
- Scalability: As your organization grows, scaling authentication across different tools and cloud providers becomes easier. OIDC works across AWS, Azure, and other cloud platforms, enabling seamless integration.
In short, using OIDC helps you improve security and reduce complexity. It allows Azure DevOps to authenticate with AWS in a more secure and scalable way, without the need for managing AWS access keys manually.
How Do You Establish Trust Between Azure and AWS for OIDC Authentication?
Now, when integrating Azure DevOps with AWS via OIDC, the first step is to set up AWS to trust Azure as an identity provider. This is important for allowing Azure DevOps pipelines to authenticate with AWS securely without using AWS access keys.
To do this, you need to create an IAM OIDC identity provider in AWS that links to Azure DevOps. The identity provider will act as a bridge, enabling Azure DevOps to authenticate through OIDC. Alongside this, we will configure the necessary trust policies and define the IAM roles that Azure DevOps will assume using OIDC for proper permissions to access AWS resources.
Step 1: Create the AWS Service Connection in Azure DevOps
The first task is to establish the connection between Azure DevOps and AWS using OIDC. To achieve this, navigate to the Project Settings in Azure DevOps and select Service Connections. From here, choose New Service Connection and select AWS(Firstly, make sure that you have AWS tool kit installed in Azure DevOps).

In the AWS service connection setup, the following details are required:
- Role to Assume: Enter the ARN of the IAM role you will create in AWS (e.g., arn:aws:iam::87438734837:role/azure-aws-oidc-role). Make sure to replace the Account ID (e.g., 87438734837) with your own AWS account ID.
- Role Session Name: You can name this session as azure-aws-oidc-role.
- External ID: You can name this as azure-aws-oidc-role as well.
- Use OIDC: Ensure you select this option, as this is what establishes the OIDC connection.
- Service Connection Name: This will be aws-oidc-role, which you'll use in your pipeline to reference the connection.
- Security: Grant access to all pipelines, ensuring that any pipeline within the project can use this service connection.

Once the connection is set up, it will allow Azure DevOps to securely authenticate with AWS without the need for static access keys.
Step 2: Create a Simple Pipeline to Fetch the Organization GUID
Next, you need the Azure DevOps Organization GUID, which is required for the configuration. To get the GUID, you can create a simple pipeline that calls AWS CLI to test the connection.
Here’s a sample YAML for the pipeline:
- main
pool:
name: ‘Default’
variables:
aws.rolecredential.maxduration: "3600"
steps:
- task: AWSShellScript@1
continueOnError: true
displayName: "Running aws-cli get-caller-identity"
inputs:
awsCredentials: 'aws-oidc-role' # The name of the service connection you created
regionName: 'us-east-1'
scriptType: inline
inlineScript: |
aws sts get-caller-identity
After running this pipeline, it will fail because the necessary role doesn’t exist yet. However, this step is important because the logs will output the Organization GUID needed for the next step.

Step 3: Create the Role in AWS for OIDC Authentication
Now that you have the Organization GUID, it’s time to set up the IAM role in AWS for OIDC authentication. First, go to IAM > Identity Providers in the AWS Management Console and click Add Provider. Choose OpenID Connect as the provider type. For the Provider URL, use:
Replace {OrganizationGUID} with the GUID obtained in the previous pipeline run.
For Audience, use api://AzureADTokenExchange. After entering these details, click Add Provider.

Once the provider is added, assign the necessary IAM role:
- Role Name: Name the role azure-aws-oidc-role.
- Trusted Entity Type: Choose Web Identity.
- Identity Provider: Select the provider you just created.
- Audience: Use api://AzureADTokenExchange.
- Permissions: For testing, you can select AdministratorAccess (avoid using this in production environments).
- Click Create Role.
This role now trusts Azure DevOps for authentication via OIDC.
Step 4: Rerun the Pipeline
After creating the role in AWS, you can rerun the pipeline. This time, the pipeline will successfully authenticate via OIDC, and you will see the output from the AWS CLI command, confirming that Azure DevOps can authenticate securely with AWS resources.

With the trust relationship between Azure DevOps and AWS now established, we’ve set the foundation for using OIDC to authenticate Azure DevOps pipelines with AWS.
How Can You Use Terraform with OIDC Authentication in Azure DevOps Pipelines?
Now, let’s walk through configuring Terraform to use OIDC for managing AWS resources securely in your Azure DevOps pipelines. This will allow you to authenticate with AWS via OIDC, without the need to manage access keys manually.
The goal here is to create a simple AWS S3 bucket, leveraging the OIDC authentication established in the earlier section.
Step 1: Configure the Terraform AWS Provider to Use OIDC
The first thing you need to do is configure the AWS provider in Terraform to use the IAM role created for OIDC authentication in the Azure DevOps pipeline. This will allow the pipeline to authenticate via OIDC and create resources in AWS, such as the S3 bucket.
In the main.tf file, set up the provider block as follows:
region = "us-east-1" # Replace with your desired region
version = "~> 4.0" # Specify the version of the AWS provider
}
Step 2: Create the S3 Bucket Resource
Next, we define the resource to create the S3 bucket. Below is the simple main.tf configuration to create an S3 bucket:
bucket = "firefly-buck-8728-oidc" # Replace with your desired bucket name
acl = "private"
tags = {
Name = "989301-bucket"
Environment = "Dev"
}
}
This block will create an S3 bucket in the region specified in the provider configuration. Make sure that the bucket name is unique across AWS as S3 bucket names are globally unique.
Step 3: Integrate Terraform into the Azure DevOps Pipeline
Now that we have our Terraform configuration, we need to set up the Azure DevOps pipeline to use this configuration. You’ll reference the service connection (aws-oidc-role) created earlier for OIDC authentication.
Here is the YAML configuration for your Azure DevOps pipeline:
- main # Trigger the pipeline on push to the main branch
pool:
name: 'Default' # Replace 'Default' with your desired agent pool name
variables:
aws.rolecredential.maxduration: "3600"
steps:
- task: AWSShellScript@1
displayName: "Running aws-cli get-caller-identity"
inputs:
awsCredentials: 'aws-oidc-role' # AWS OIDC service connection
regionName: 'us-east-1'
scriptType: inline
inlineScript: |
aws sts get-caller-identity # Test AWS access using OIDC
- script: |
terraform init
terraform plan -out=tfplan
terraform apply -auto-approve tfplan
env:
AWS_DEFAULT_REGION: 'us-east-1'
In this config:
- AWSShellScript Task: This step uses the AWS CLI to verify the connection with AWS, using the OIDC service connection (aws-oidc-role). It runs the aws sts get-caller-identity command to check if the authentication works correctly.
- Terraform Installer: This task installs Terraform on the agent.
- Terraform Init: Initializes the Terraform configuration. It connects to AWS using the OIDC authentication.
- Terraform Plan: This task generates the execution plan for Terraform to create the resources.
- Terraform Apply: This task applies the plan, creating the resources (S3 bucket in this case) in AWS.

Step 4: Running the Pipeline
Once the pipeline is set up and the configuration is in place, simply commit and push your changes to the main branch to trigger the pipeline. If everything is configured correctly, the pipeline will:
- Use OIDC authentication to securely connect to AWS.
- Run Terraform to create the S3 bucket in AWS.

You can monitor the pipeline execution in the Azure DevOps portal to ensure that the resources are created as expected.
By integrating OIDC with Azure DevOps and AWS, we've streamlined the authentication process, removed the need to manage access keys, and leveraged the power of Terraform to manage AWS infrastructure securely. This approach ensures that your infrastructure as code setup is both secure and efficient, without the overhead of manually handling credentials.
What Are the Best Practices for Managing OIDC Authentication Across Multi-Cloud Environments?
As we’ve established OIDC authentication between Azure DevOps and AWS, it's important to follow some best practices to make sure that your setup remains secure, scalable, and efficient. Proper management of OIDC across multi-cloud environments helps avoid security pitfalls and makes sure that your resources are well-protected. Below, we’ll go over some of the best practices for using OIDC across Azure DevOps, AWS, and other cloud platforms.
Manage Least Privilege Access
Always apply the principle of least privilege when configuring IAM roles for OIDC. Ensure that each role in AWS only has the permissions necessary to perform the specific task at hand. For example, if your pipeline only needs to create an S3 bucket, limit the role to s3:CreateBucket rather than granting broader permissions like full administrator access. This minimizes the risk of unauthorized access.
Enforce Multi-Factor Authentication (MFA)
MFA is a simple but powerful security measure. Enforce MFA for both Azure DevOps and AWS accounts to ensure that only authorized users can access and perform sensitive operations. This is particularly important when dealing with high-privilege actions, such as assuming roles or accessing critical resources.
Auditing Role Assumptions
Keep track of who is assuming roles and when. AWS CloudTrail allows you to monitor role assumption events and ensure that only authorized entities are accessing resources. Similarly, Azure DevOps provides audit logs to track changes to service connections and pipeline executions. Regularly review these logs for any suspicious activity.
By following these best practices, you’ll be able to maintain a secure, efficient, and scalable OIDC setup across your multi-cloud environments, ensuring your Azure DevOps pipelines are safe and compliant.
Now, when you are managing your cloud infrastructure, one of the biggest challenges is maintaining visibility over what’s being deployed across complex environments. Teams working with AWS, especially when handling dependencies between resources, often struggle to track how infrastructure changes will impact their environments. Without clear insights into dependencies, it can be hard to predict how changes will cascade, making it difficult to maintain security, compliance, and cost controls.
Security misconfigurations - such as publicly accessible resources, weak IAM policies, or unmonitored instances - are a significant risk. These issues can slip through the cracks and compromise your infrastructure. Compliance with security standards becomes reactive instead of proactive, which increases the chances of overlooking critical vulnerabilities.
Cost control is another pain point. While Terraform plan outputs give an overview, they offer limited insight into the financial implications of deploying resources. Without visibility into the costs of infrastructure changes before they are applied, teams might inadvertently provision expensive resources. This lack of visibility creates a reactive management process that often leads to unexpected expenses and resource inefficiencies.
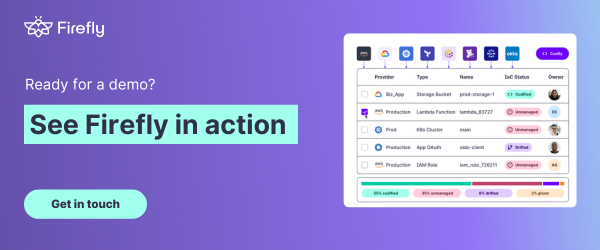
Firefly: Simplifying your CI/CD with Terraform Workflows
Firefly Workspaces integrates simply with your CI/CD pipelines to improve your Terraform workflows by offering real-time insights into what is about to be deployed. Firefly supports multiple CI/CD environments, giving flexibility in managing Terraform workflows across various platforms.
It goes beyond static Terraform plans and provides a visual representation of the infrastructure's dependencies, highlighting how resources are interconnected. This visualization makes it much easier for teams to understand what will be created, modified, or deleted before running terraform apply. As a result, teams can reduce the risk of unexpected issues arising from deployments.

Security is another important area where Firefly excels. It actively scans Terraform plans and flags misconfigurations that could leave infrastructure vulnerable to threats. Even a small mistake, such as an EC2 instance missing a monitoring agent or a public-facing subnet being assigned an external IP, can lead to security breaches. Firefly automatically flags these potential risks and ensures only secure infrastructure gets deployed.
Firefly also provides valuable cost visibility. By analyzing your Terraform plans, Firefly estimates the costs associated with the changes before they’re applied. This enables teams to make informed decisions and adjust configurations early to meet budget constraints, rather than discovering excessive costs after the resources are running.
One of the major challenges in infrastructure management is making sure that every deployment adheres to security and compliance standards. Firefly addresses this challenge by introducing Guardrails-an additional layer of protection that proactively prevents misconfigurations from being deployed.
Guardrails go beyond post-deployment security scans by enforcing policies in real-time, blocking unsafe configurations before they even reach production. For example, if an attempt is made to deploy a resource with an unsecured public IP or an IAM role with overly broad permissions, Firefly will immediately flag the violation and halt the deployment. This prevents the rollout of insecure infrastructure and ensures compliance with security best practices.

By integrating Guardrails into your CI/CD workflows, Firefly acts as an automated security safeguard that helps minimize risks before your infrastructure goes live. Whether it’s preventing unauthorized public IPs, enforcing encryption standards, or limiting IAM role permissions, Firefly ensures your infrastructure is both secure and compliant from the start.
Frequently Asked Questions, Answered
What IAM roles do I need to set up in AWS for Azure DevOps OIDC integration?
To set up OIDC integration between Azure DevOps and AWS, you need to create an IAM OIDC identity provider in AWS that links to Azure DevOps. Then, define an IAM role with Web Identity as the trusted entity and associate it with the OIDC provider. This role should have the necessary permissions for your Azure DevOps pipeline to access AWS resources (e.g., creating S3 buckets or managing EC2 instances).
Can I use Azure DevOps pipelines to deploy AWS resources without static AWS access keys?
Yes, Azure DevOps pipelines can deploy AWS resources without using static AWS access keys by leveraging OIDC. Using a service connection in Azure DevOps, you authenticate via OIDC tokens instead of static keys, reducing security risks and eliminating the need for key management.
What are the common issues when integrating OIDC between Azure DevOps and AWS?
Common issues include incorrect IAM role configurations, such as missing permissions or incorrect trust policies. Misconfiguration of the OIDC provider URL or Audience in AWS, and issues with Azure DevOps service connections, can also cause integration failures. Ensuring proper role trust relationships, accurate service connection setup, and correct IAM policies is essential for a smooth integration

.svg)